For centuries now, fireworks have not only been one of…
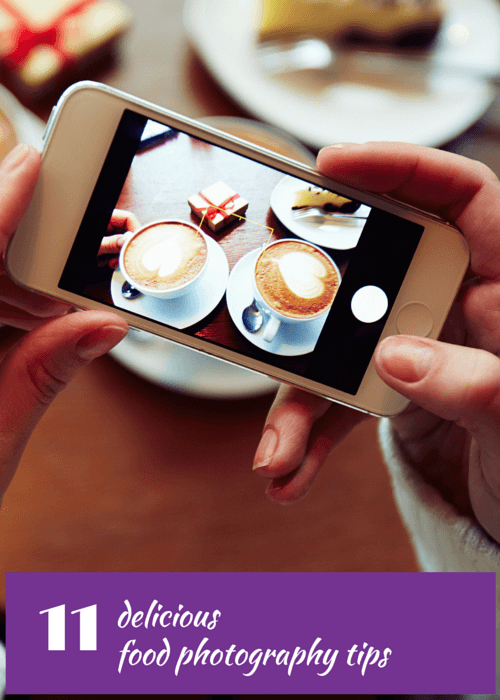
11 Delicious Food Photography Tips
If you’ve ever taken a quick food selfie before digging in at your favourite restaurant, or if you’ve ever wanted to capture the memory of the time your pavlova turned out perfectly without a single crack, you’d know that taking effective photographs of food is nowhere near as easy as it looks. If you would love to perfect your photography skills, read on for our secret collection of delicious food photography tips to turn you from home chef into food blogger in minutes. And yes, you can achieve these amazing effects with nothing more than your smart phone camera: if you know how.
Lighting
chinese food by Agustín Nieto: https://www.flickr.com/photos/roundtrip/14220940589/
chinese food by Agustín Nieto
Lighting is one of the most important elements of every kind of photography, so you should keep it foremost in your mind when taking photos of food. Wherever possible, make use of natural light. Don’t feel that you need to confine your photo sessions to the kitchen: pick up the dish and wander around until you can find the perfect natural light source. Avoid using a flash or other inbuilt artificial light source: there’s nothing quite like beautifully and naturally lit photos to bring out every element and every shade of colour.
Keep It Clean
Before you start snapping away, make sure that your photography area as well as the plate or bowl itself is immaculately clean. Cooking is an inherently messy process, and it can be easy to overlook a couple of crumbs or a slight smudge of oil or sauce. You may not see it while you are plating up, but you can be sure that you and everyone else will notice it in your photos. Use the tip of a damp cloth or a small brush to get everything perfectly clean before you go any further.
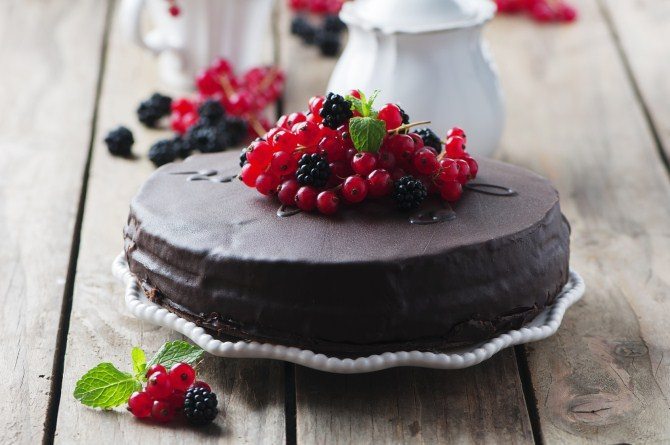
Consider Colour
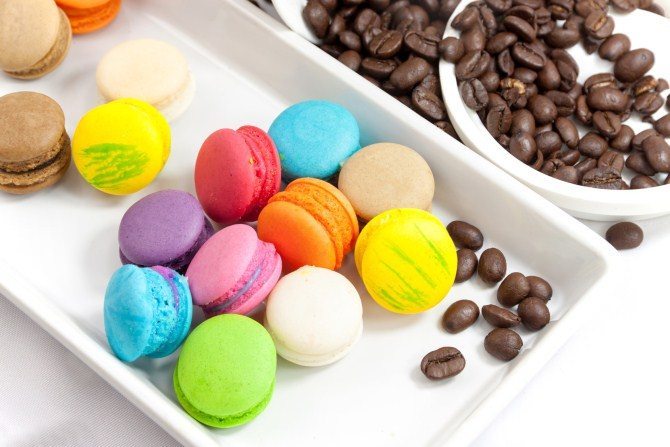
There may not be a lot you can do to change the colour of the food (although you may be able to add some colour with a garnish or side decoration), however you do have options when it comes to the serving dishes and the backdrop of your photos. As a general rule, avoid plates and bowls that are the same colour as the food, and choose a harmonising colour if you want your food to appear warm and comforting, and a contrasting colour (as beautifully shown here) if you want the food to appear fun and exciting.
Before and After
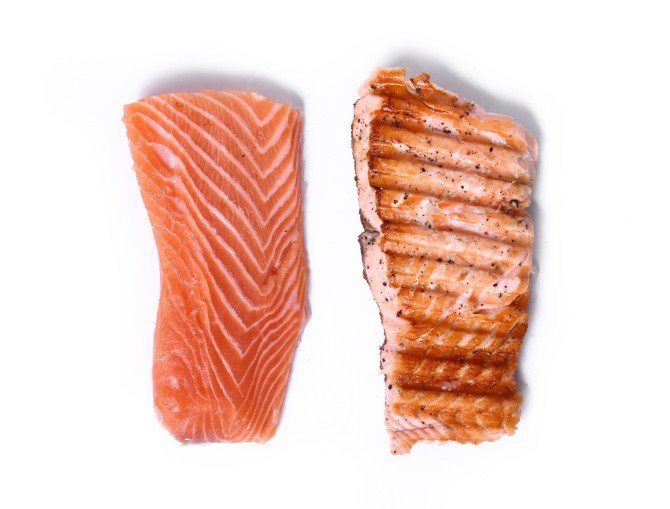
If you are photographing a dish that tastes a lot better than it looks, such as dishes with several combined ingredients like soups, stews, and casseroles; or anything that needs to go in a blender or food processor, consider taking before and after photos. Before and after photos can showcase the beautiful ingredients in your recipe, contrasting them to the somewhat duller image made by the food after it has been cooked or processed.
Showcase Your Ingredients

Chocolate Souffle by Carwyn Lloyd Jones – Dylunio Creadigol: https://www.flickr.com/photos/21607251@N05/7724229664/
Chocolate Souffle by Carwyn Lloyd Jones – Dylunio Creadigol
Experiment with including different props in your food photography, such as extra portions of your main or most delicious ingredients alongside the finished product. In this example, the image of the rich, dark chocolate block helps bring the cakes to life, allowing the viewer to imagine the chocolatey goodness that would not otherwise have been implied with a photo of the cake alone.
See Things from a Different Angle
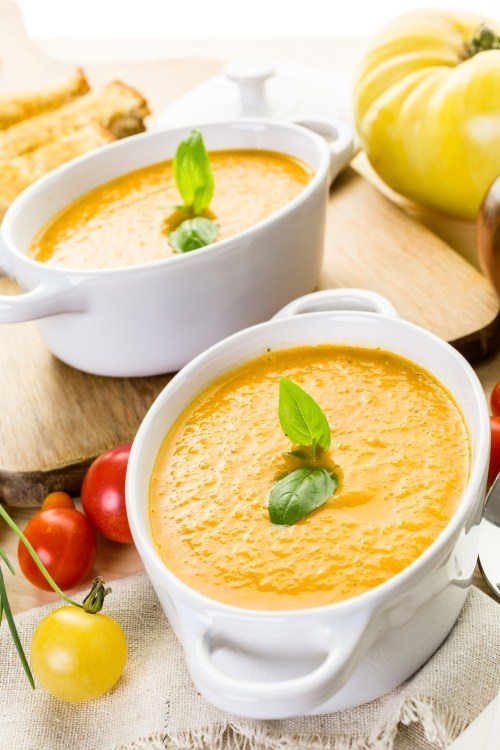
One of the simplest food photography tips we can offer is to experiment with different photography angles. It’s a simple fact of food photography that some food simply photographs better from the top while other dishes appear much more appetising from the side. Explore your dish from all angles and see where it most comes to life.
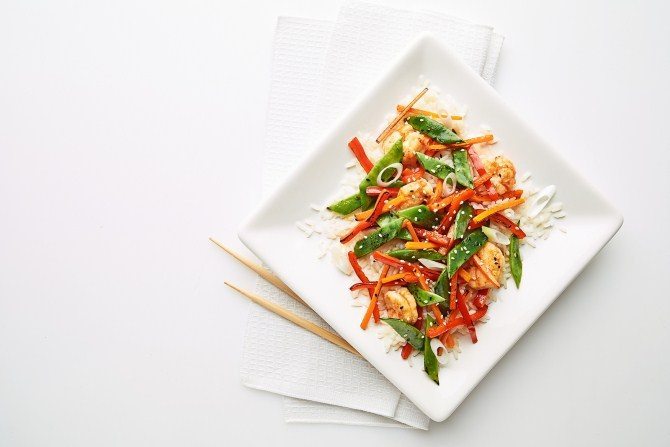
Play with Props
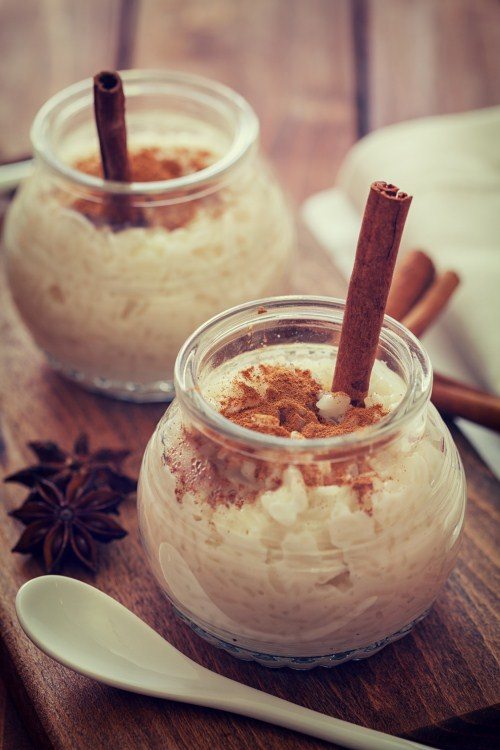
When photographing food, it is best to stick with the time-honoured ‘less is more’ rule. Be careful with props as they can be distracting and take the focus away from the dish. When used effectively, props are generally very simple and understated, and typically involve a raw ingredient used in the dish, the cutlery used to eat the dish, or something to hint at the flavour of the dish, such as the cinnamon sticks and spoon in the example shown. Another good example is to show chopsticks next to an Asian dish, which adds to the overall style and tone of the cuisine.
Zoom
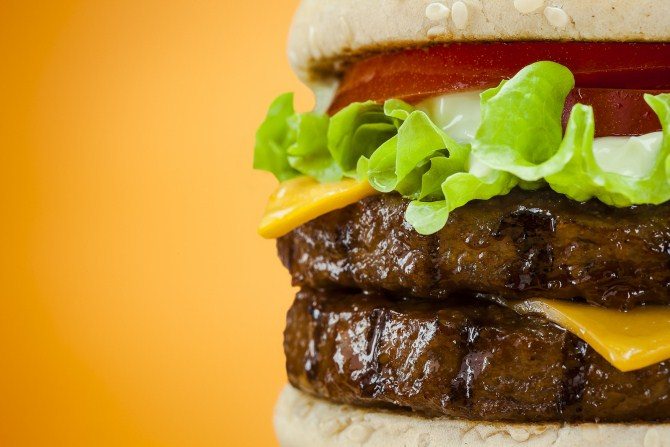
Burger by Agustín Nieto: https://www.flickr.com/photos/roundtrip/14354436062/
Burger by Agustín Nieto
As another general rule, the less appetising a dish looks in its entirety, the better the result will get by zooming in on one particular element of the dish. For example, a dull coloured soup or stew can be made infinitely more interesting by serving it in a square bowl and zooming in to show just one corner of the dish. In this example, this hamburger looks juicy and perfectly cooked, though you can probably imagine that if we zoomed out, the hamburger in its entirety might start looking less impressive.
Show Us How
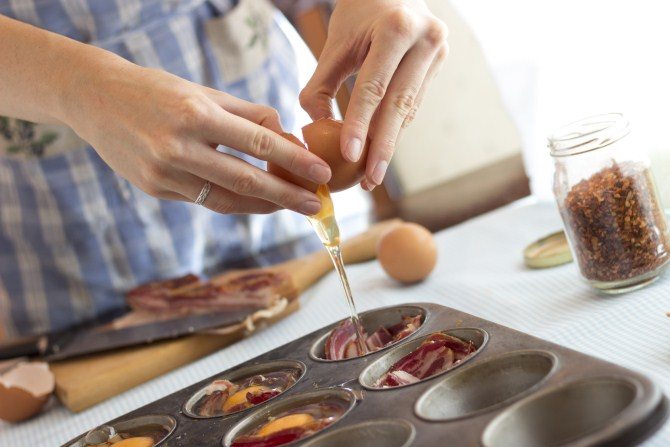
Sometimes the perfect accompaniment to an average food photograph is another photo highlighting one of the steps in the dish’s preparation. In this example, we can see the layering and technique that has gone into making the dish, and it also allows us some insight into the ingredients contained within the dish, which could be a mystery if the end result is housed in pastry.
Playful Presentation
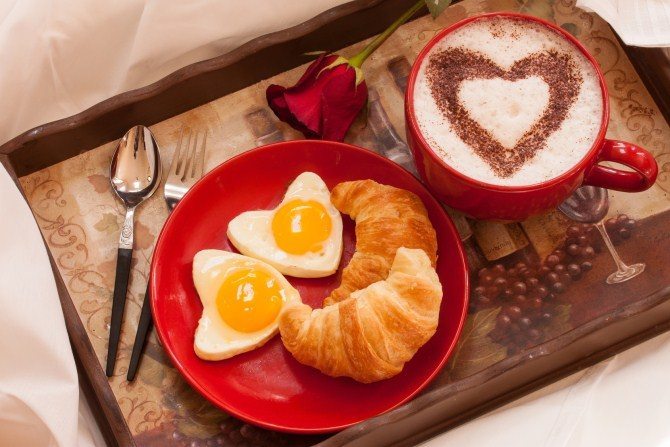
Sometimes the best way to showcase a dish is to bring some emotion to it. In this instance, there is nothing remarkable about the eggs, croissant, and cappuccino, though presented in this way tells a much larger story than the food alone ever could. This tells the story of breakfast in bed, of romance and the element of surprise, of careful preparation and a thoughtful gesture. Suddenly this photo isn’t about eggs, croissants and coffee, it’s about romance and breakfast in bed: making the dish that much more appetising.
Bring in the Humans
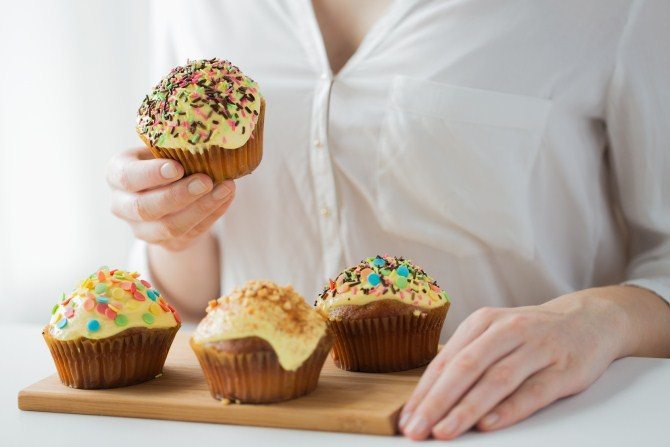
Photography often involves so much zooming and cropping that it can be hard to tell the scale of an overall dish. Is that a cupcake or a full sized cake? Is that a slider or a hamburger? Including a human element in your food photography can give your dishes a sense of scale and normalcy. You don’t need to include a full person, either: even just a hand holding a spoon, fork, or chopsticks in the background can bring everything into perspective.
Food photography is as much science as it is art, and anyone can create mouthwatering photos simply by following some logical steps. Once you’ve mastered your technique and taken the perfect photo of your latest kitchen creation, click here and we’ll turn it into fantastic wall art to brighten up your kitchen or dining room.